Setup Instructions
HB PAY 2.0
Setting Up your Terminal
1. Unpack the terminal and dock and familiarise yourself with it.
2. Pay particular care to the Cautions, Care and Storage instructions.
3. Setup the dock and place terminal on dock to charge.
Important! Total first-time charge period using the dock should be a minimum of 3 hours (whilst not being used).
4. Turn on the terminal.
5. Connect your terminal to your Wi-Fi Network:
Connecting to a Wi-Fi network
- Select the Menu button (3 horizontal lines) from the top edge of the display.
- Enter your Merchant Passcode (provided with your terminal)?
- Tap Settings: Communications: Wi-Fi
- Tap the Wi-Fi toggle button turn on Wi-Fi.
- Find the correct trusted Wi-Fi network you want to join and select it. Please ensure Terminal and the computer are on the same Wi-Fi.
- Enter the network password using the onscreen keyboard.
- Once the Wi-Fi password has been entered correctly, the Wi-Fi symbol will be visible in the status bar on the top of the screen.
- The icon will indicate whether the terminal has a strong or weak connection to the Wi-Fi network. If the connection is weak, either move the terminal closer to the
- Wi-Fi router, or you may need to install a Wi-Fi Extender to boost your Wi-Fi signal
and range.
6. The terminal will need to be configured within your HB Salon software.

Setting up your Terminal in HB Salon Software
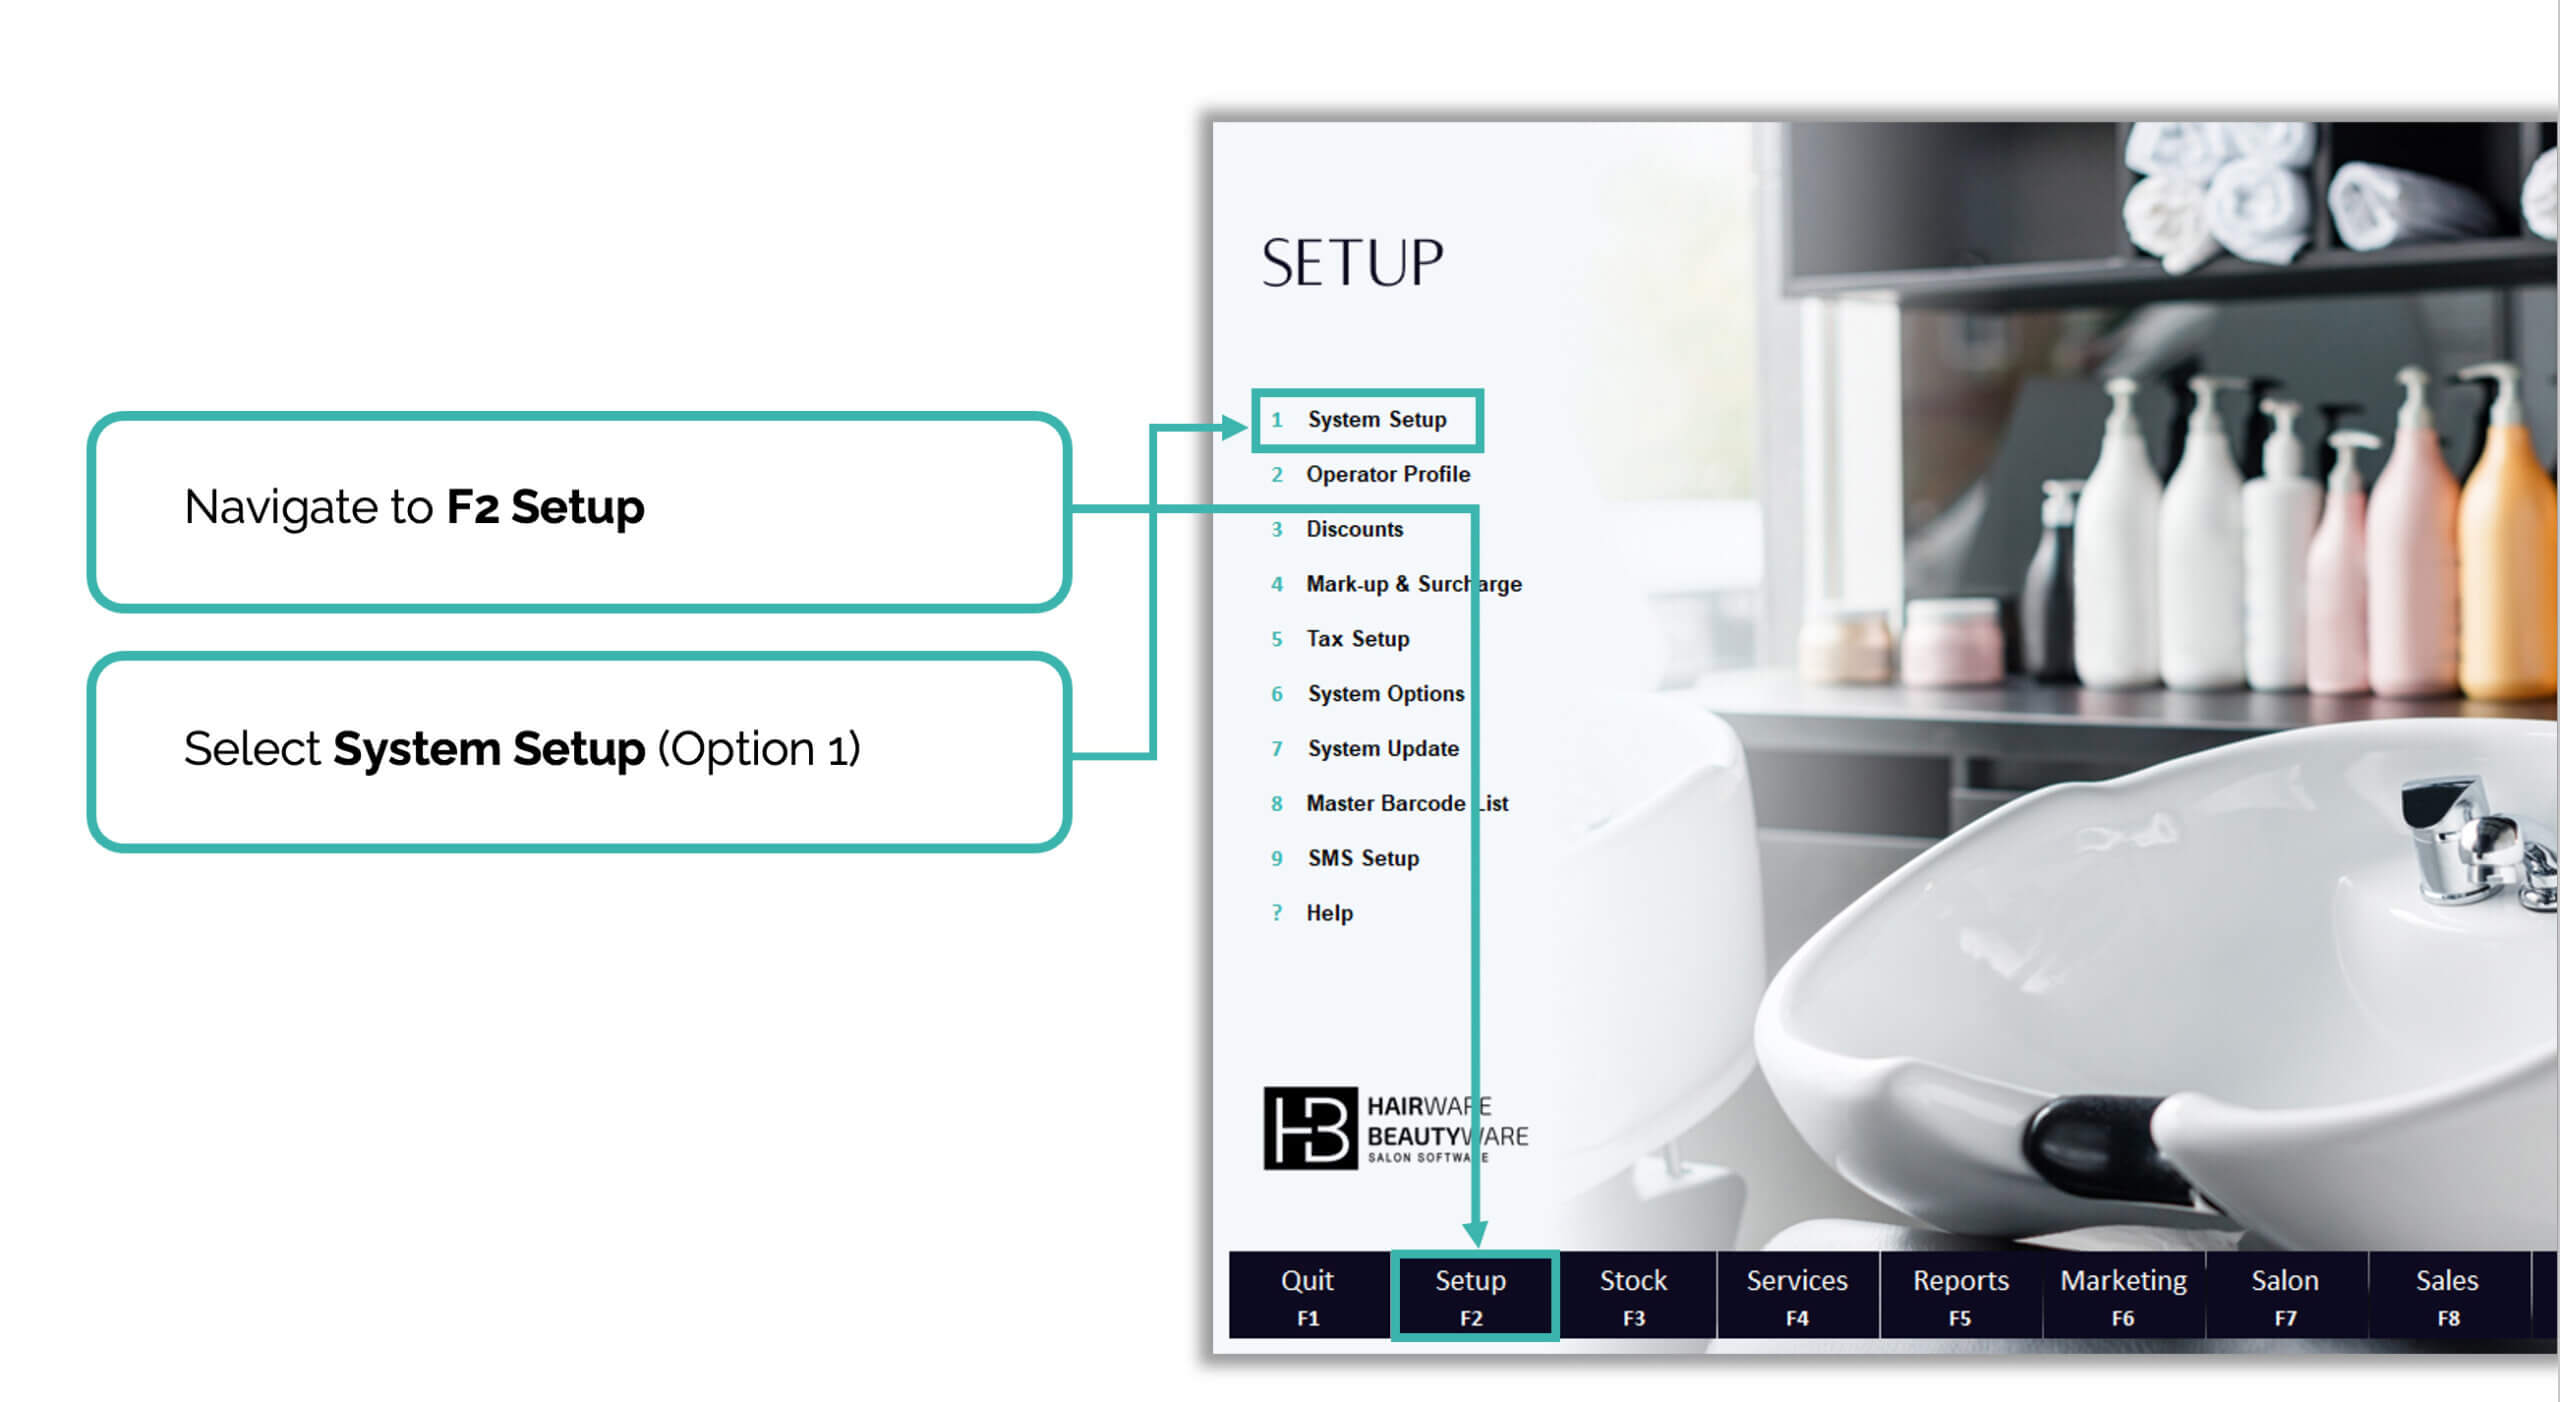
Step 1

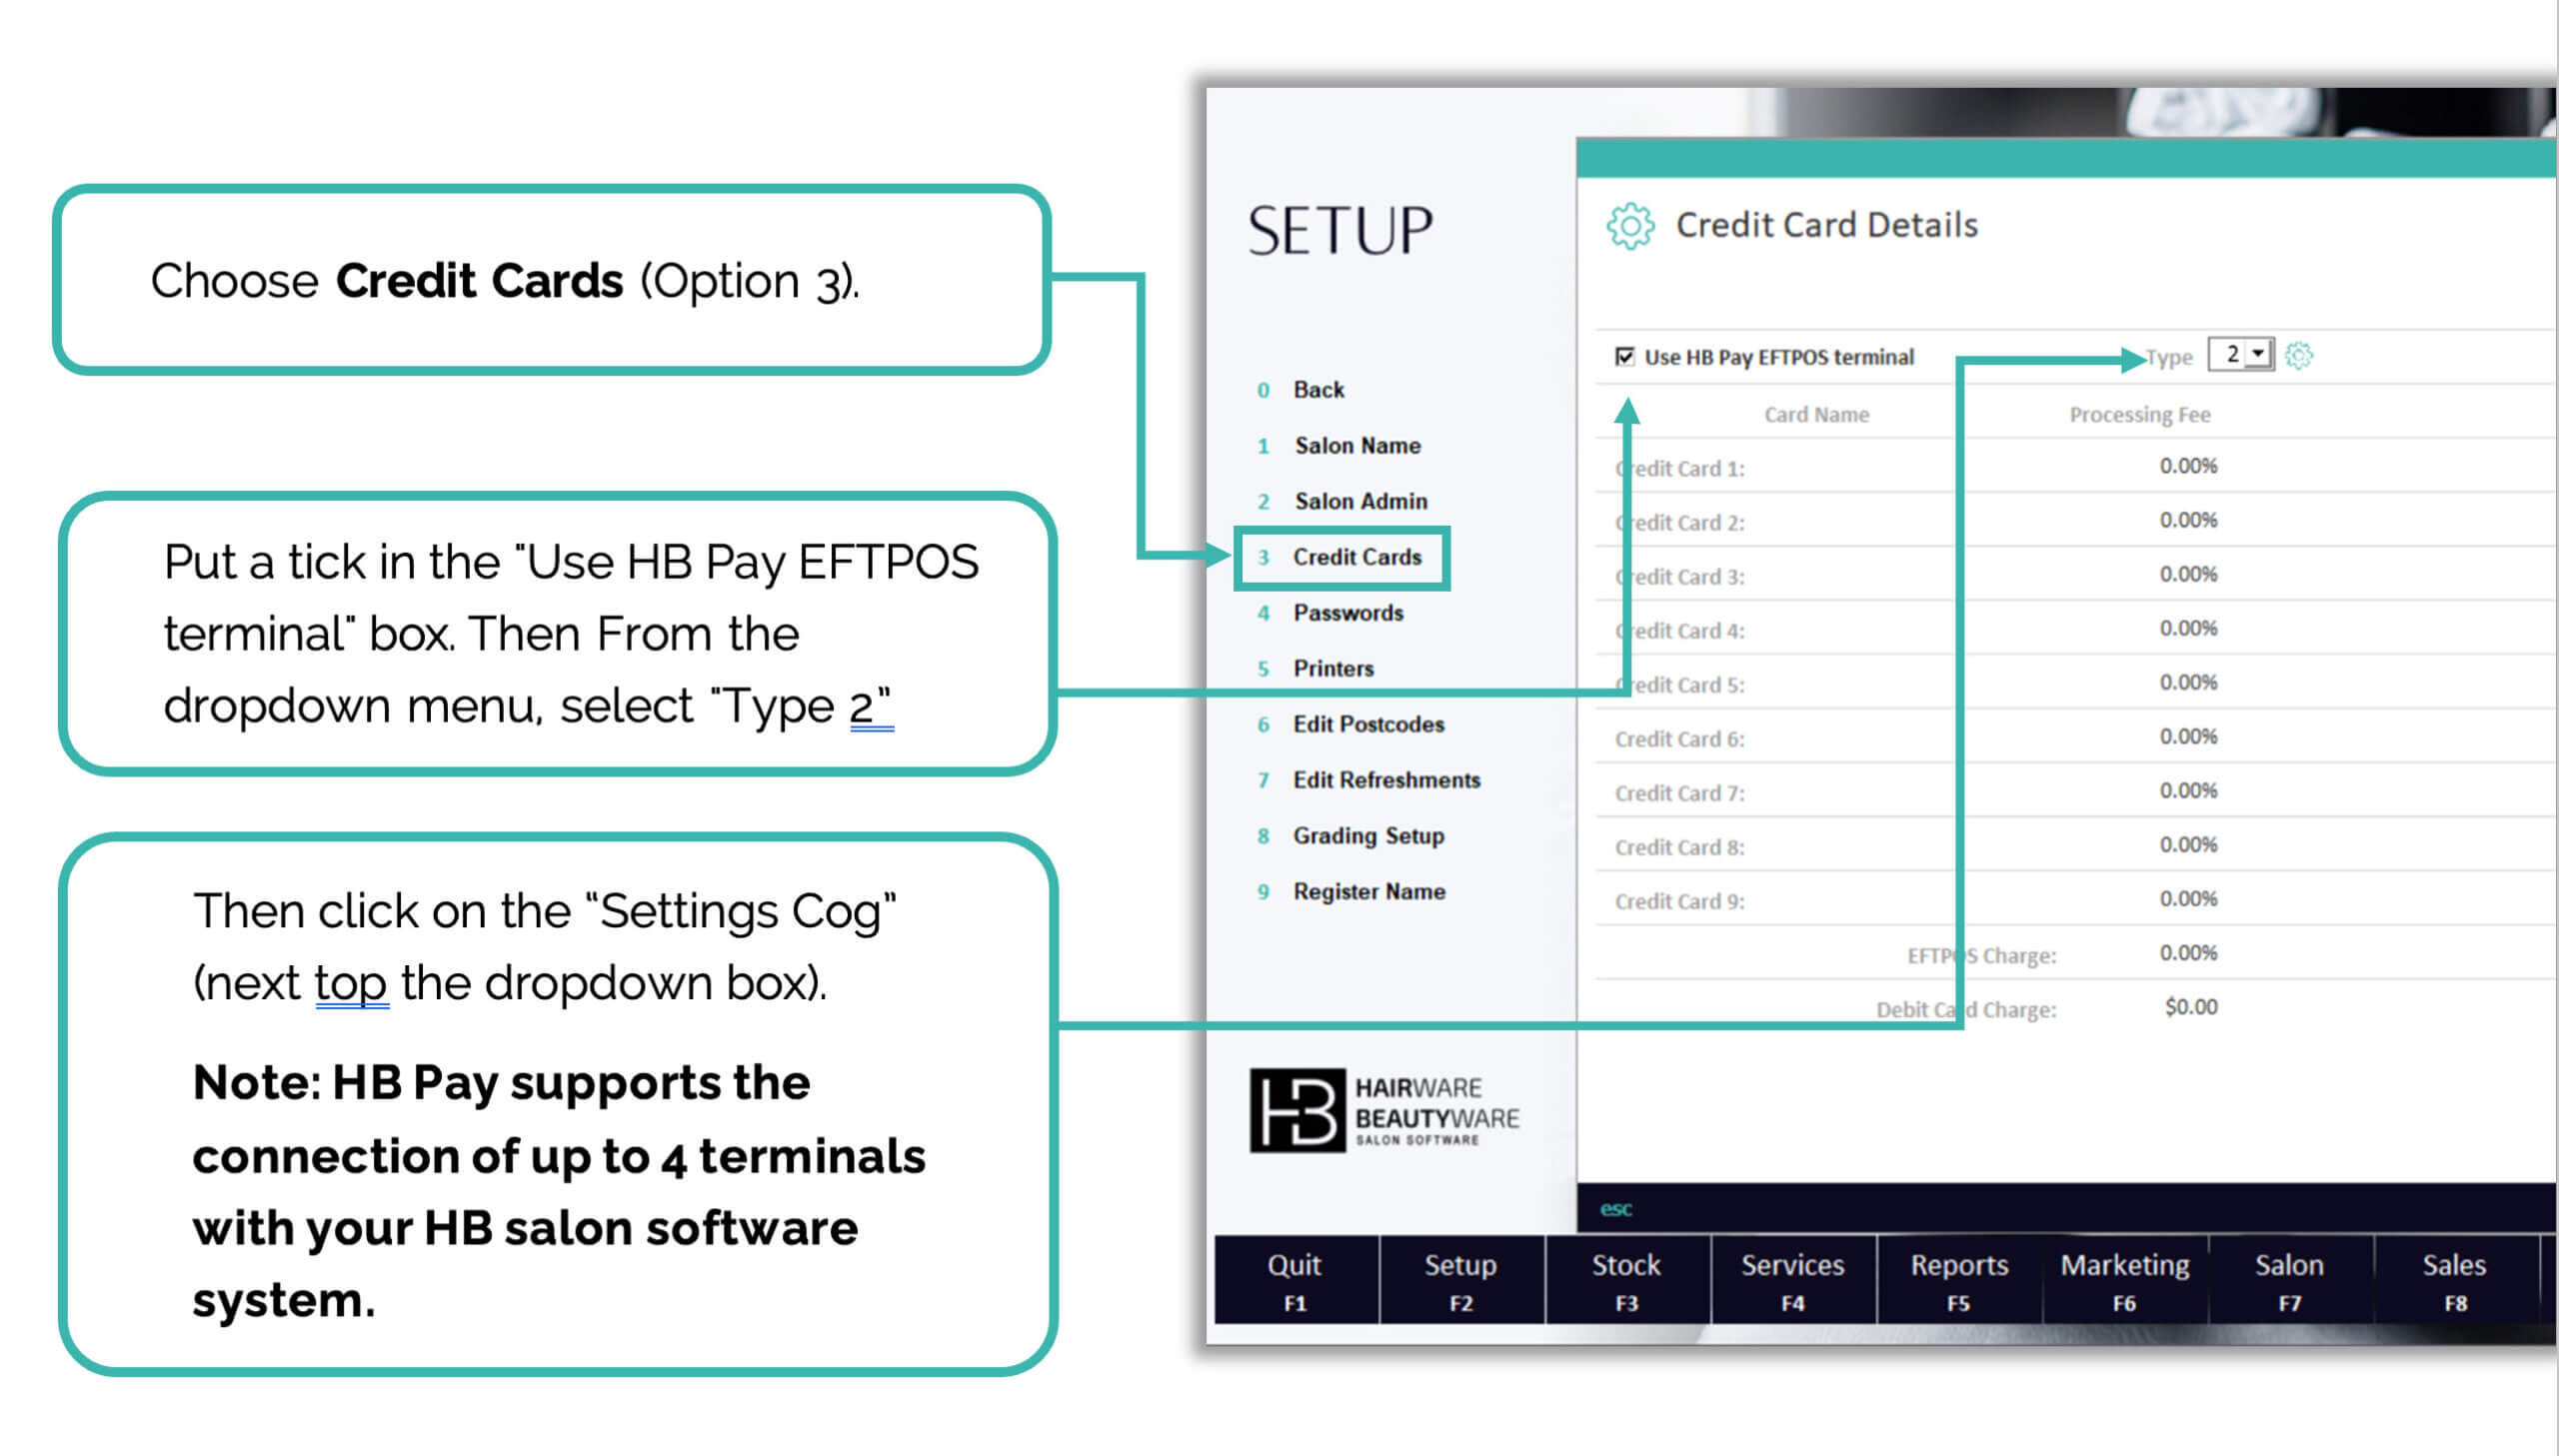
Step 2

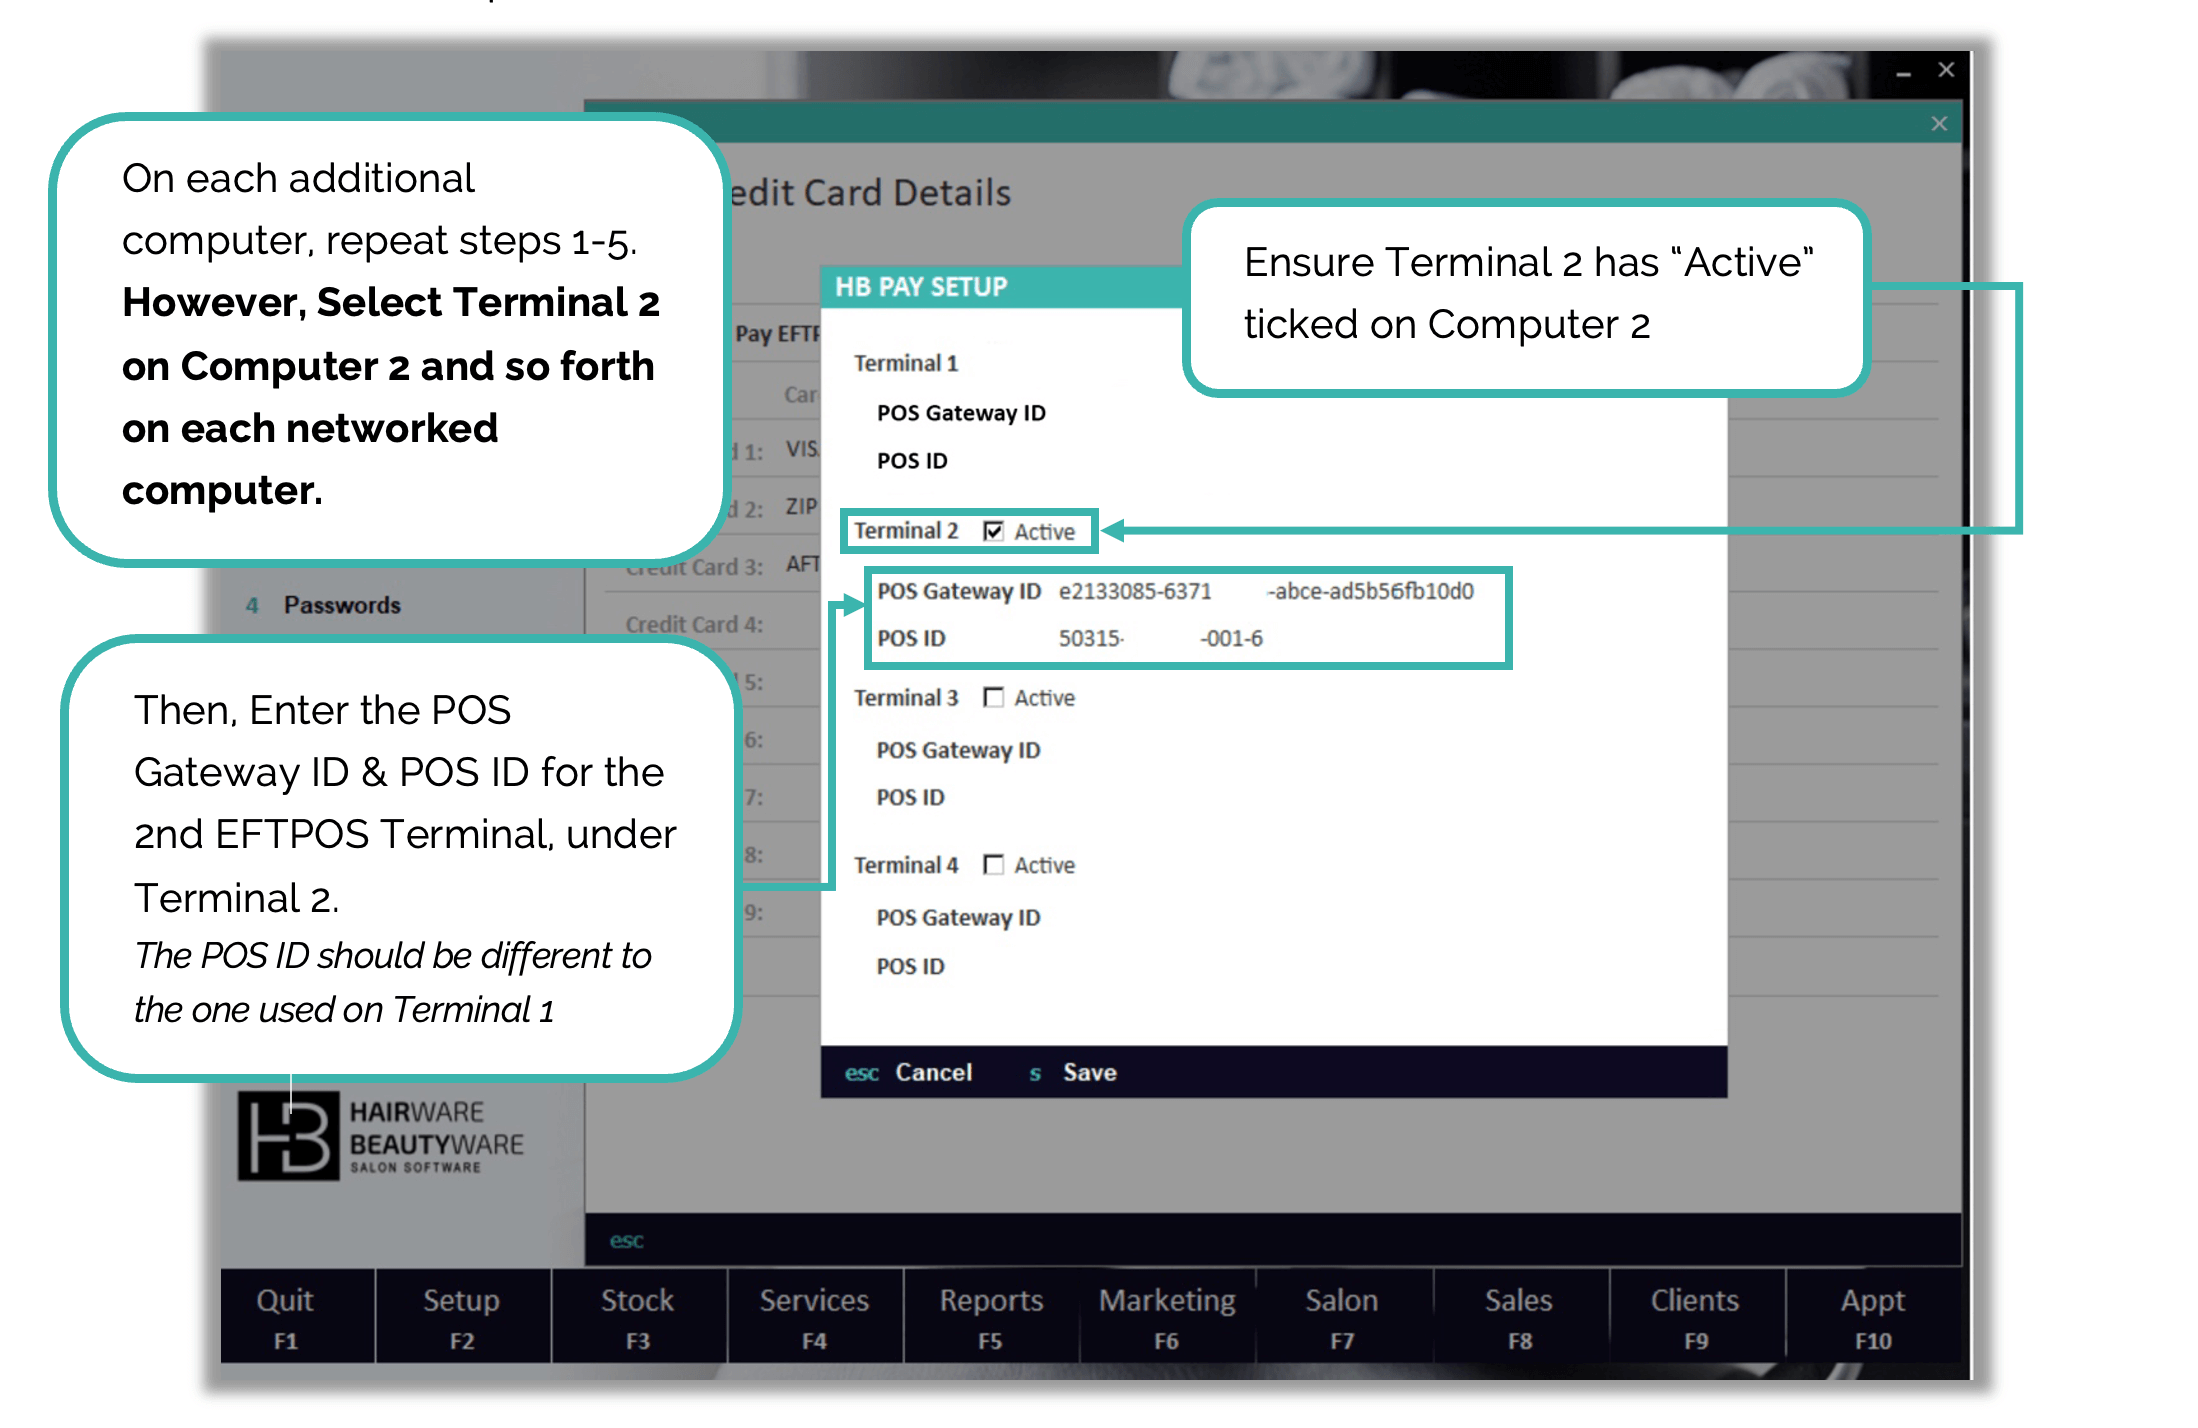
Step 3

Step 4
Click ‘Save’ to finalise the setup
Step 5
Once setup, simply Quit Hairware Beautyware and re-run the program.
Congratulations your NEW HB Pay Terminal is ready to go!
Contact HB support on 1300 880 582 for further information and instructions.
HAIRWARE BEAUTYWARE NETWORK SYSTEM
Multiple Computers and MULTIPLE EFTPOS Terminals
Each computer will need to be linked to the correct terminal.

EXAMPLE
Front Desk has 2 computers, each with their own EFTPOS terminal.
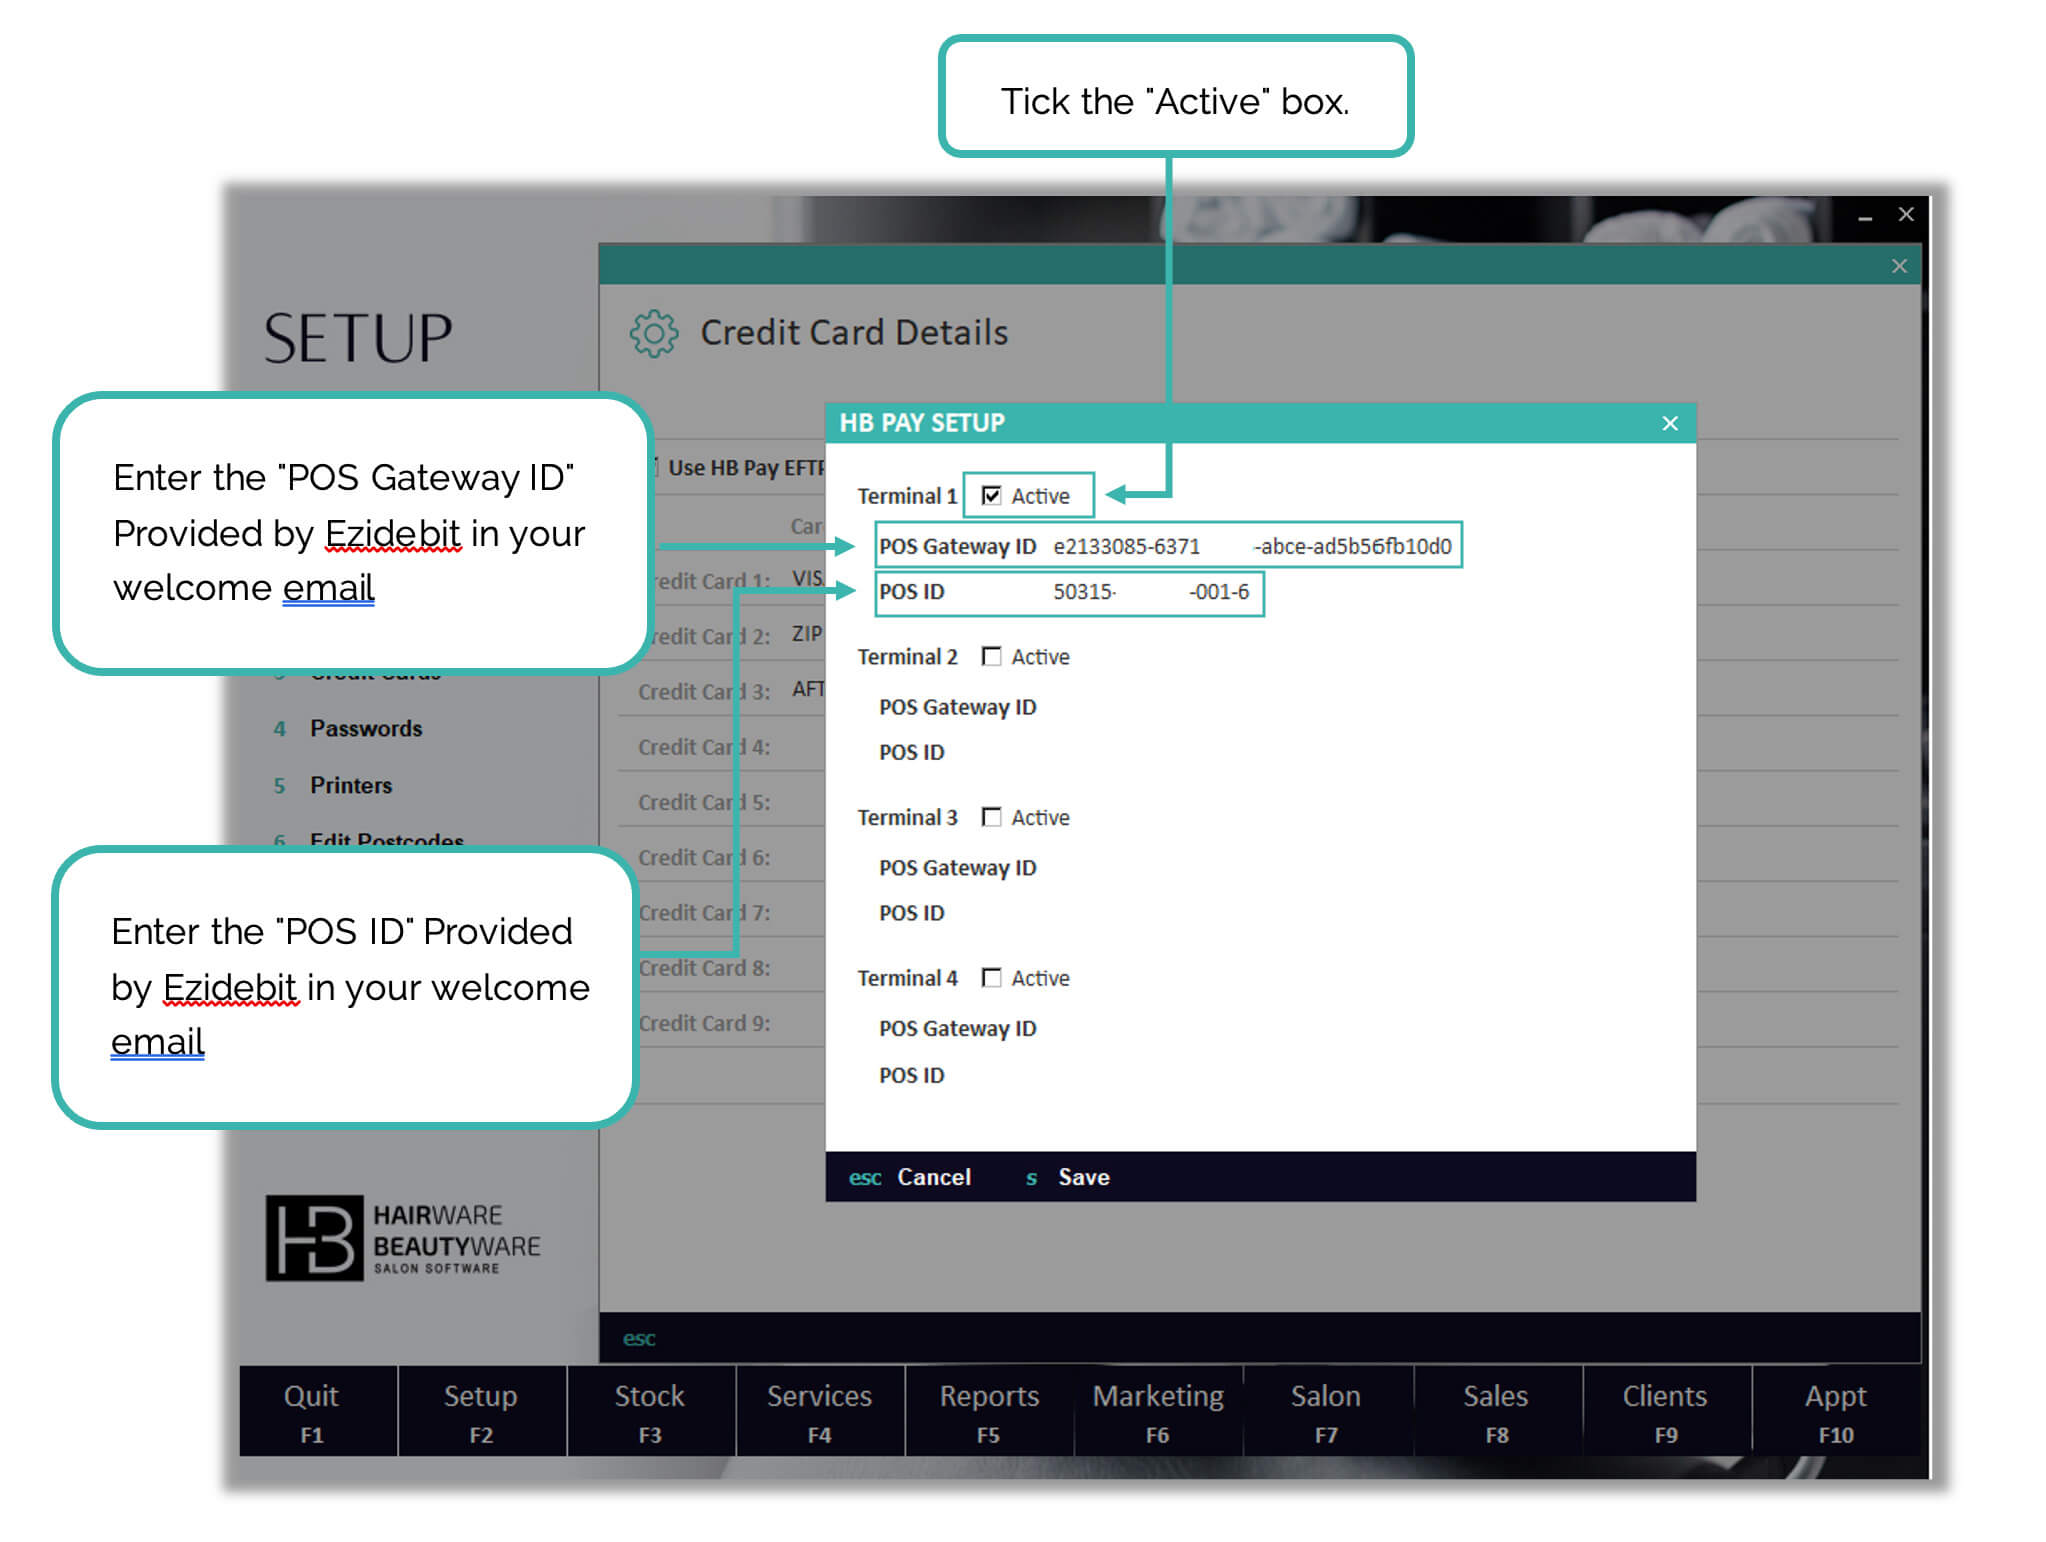
Repeat steps 1-5 on each computer.
On Computer 2, Go to Terminal 2 and Enter the POS Gateway ID & POS ID for the 2nd EFTPOS terminal.
Repeat these steps for each additional computer with it’s own EFTPOS terminal, then Selecting Terminal 3 and so forth.
Multiple computers SHARING one EFTPOS Terminal
On each additional computer, repeat steps 1-5.

EXAMPLE
Two Front Desk Computers sharing one EFTPOS terminal,
Repeat steps 1-5 on each computer, enter the same details on both computer and ensure Terminal 1 is selected on both computers and the POS Gateway ID and POS ID are the same as computer 1.
Contact HB support on 1300 880 582 for further information and instructions.
COULDN’T FIND WHAT YOU WERE AFTER?
Talk to Us
Give our team a call at 1300 880 582 for immediate assistance or send us an email and we will be in touch asap
Check our FAQs
Here is a list of frequently asked questions that might help you find what you were looking for.

